7757-K803 C900 Black Customer Display
Introduction
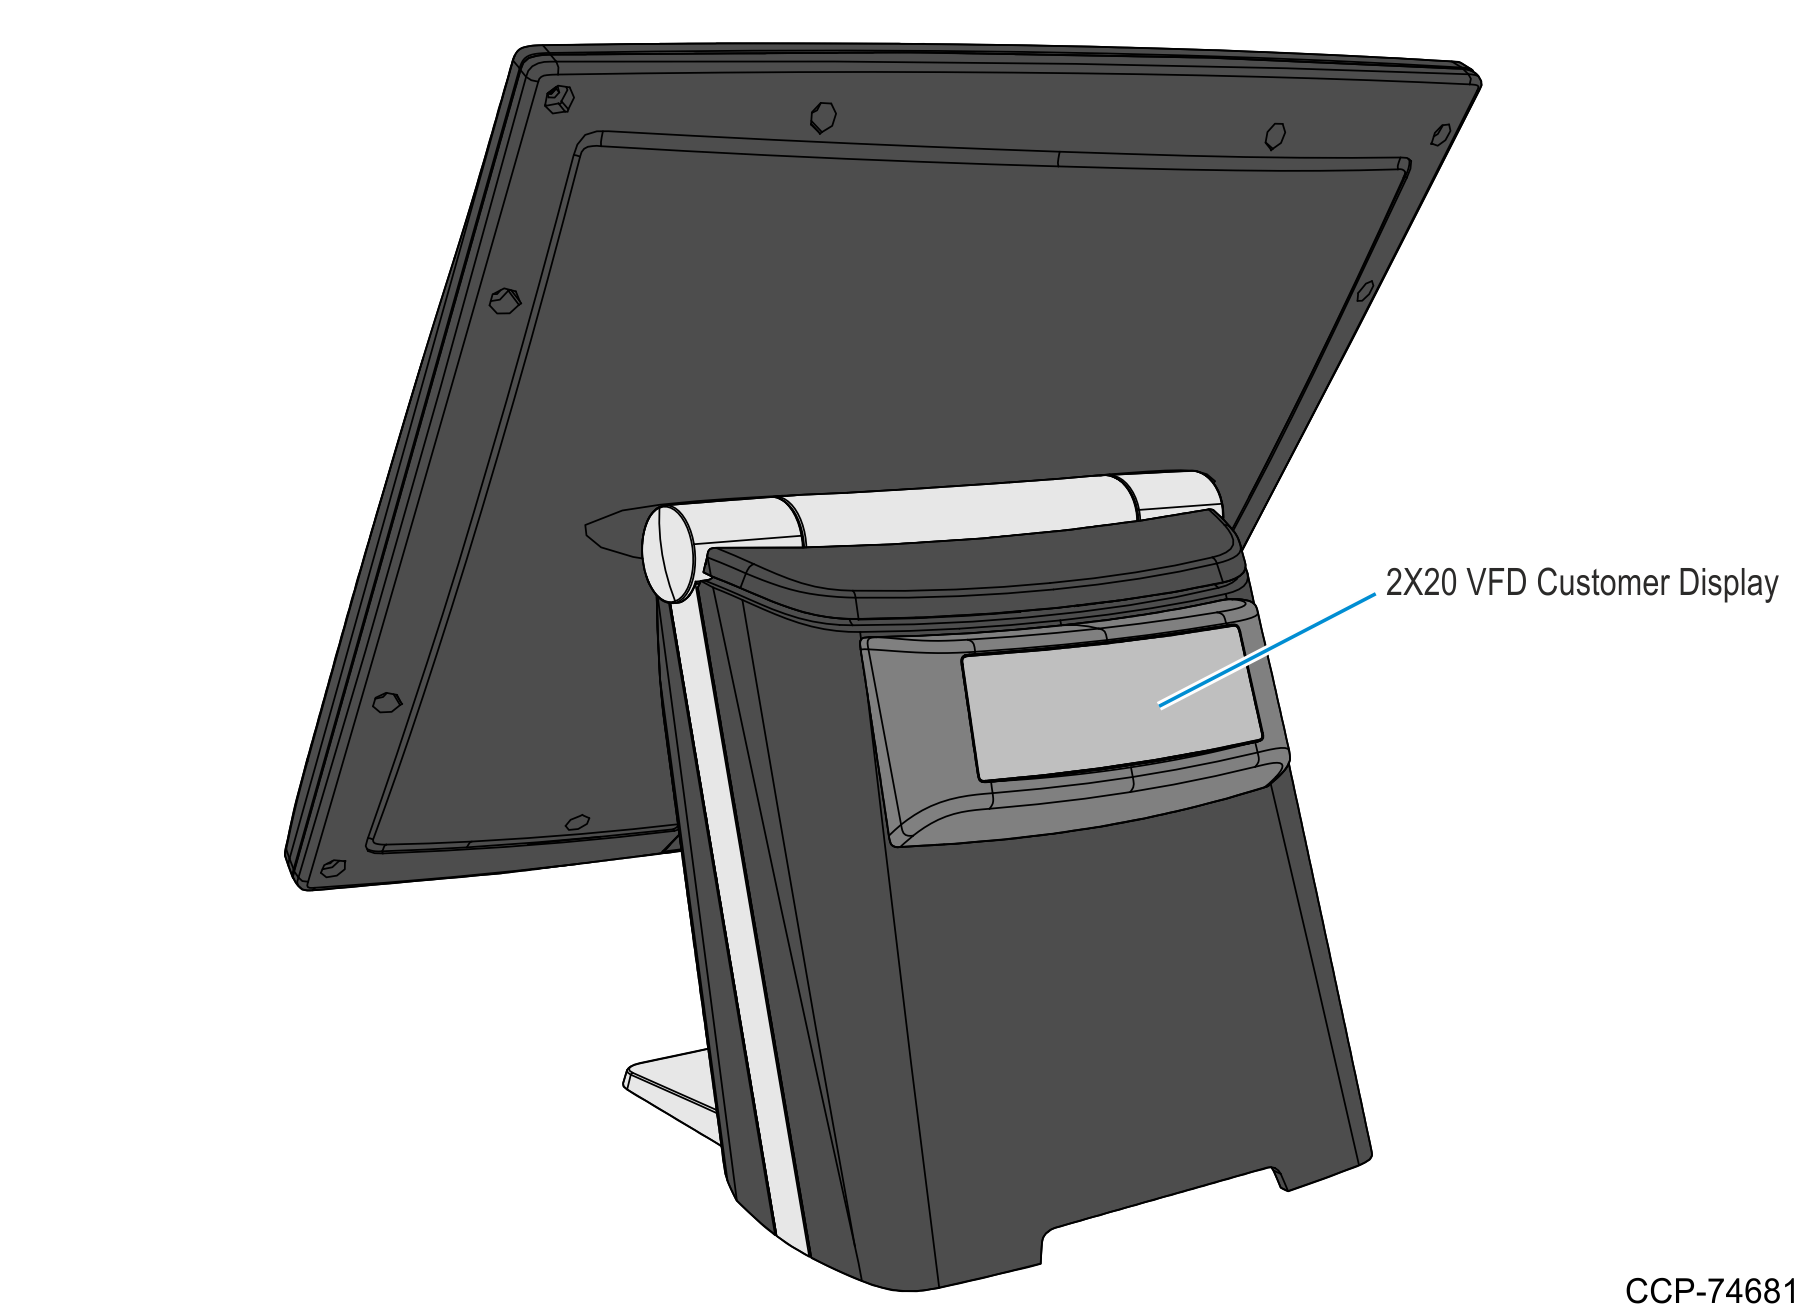
This kit provides a black 2x20 VFD Customer Display for a Columbus 900 POS terminal.
Required Tools
•M3 torx screwdriver
•12 mm (0.47 in.) drill bit for Display cable access hole
•3 mm (0.12 in.) drill bit for Display mounting holes
•Hand drill
Kit Contents
|
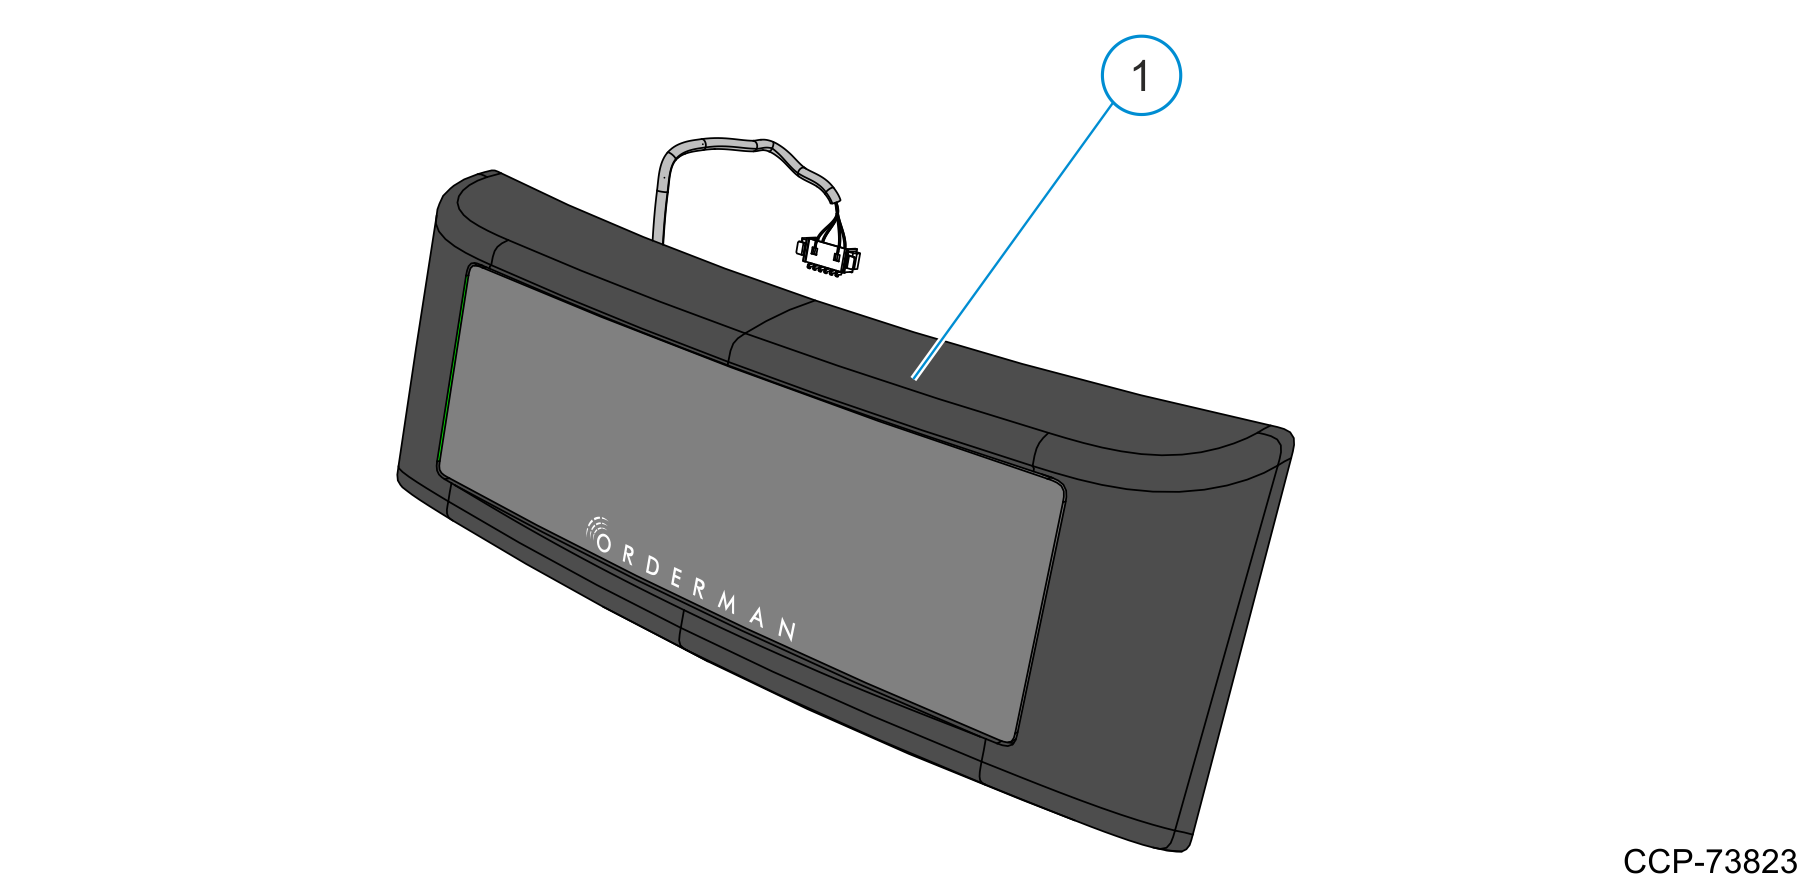
C900 2x20 VFD Customer Display (7709-K803) |
||
|---|---|---|
|
1 |
|
C900 2x20 VFD Customer Display assembly |
Installation Procedure
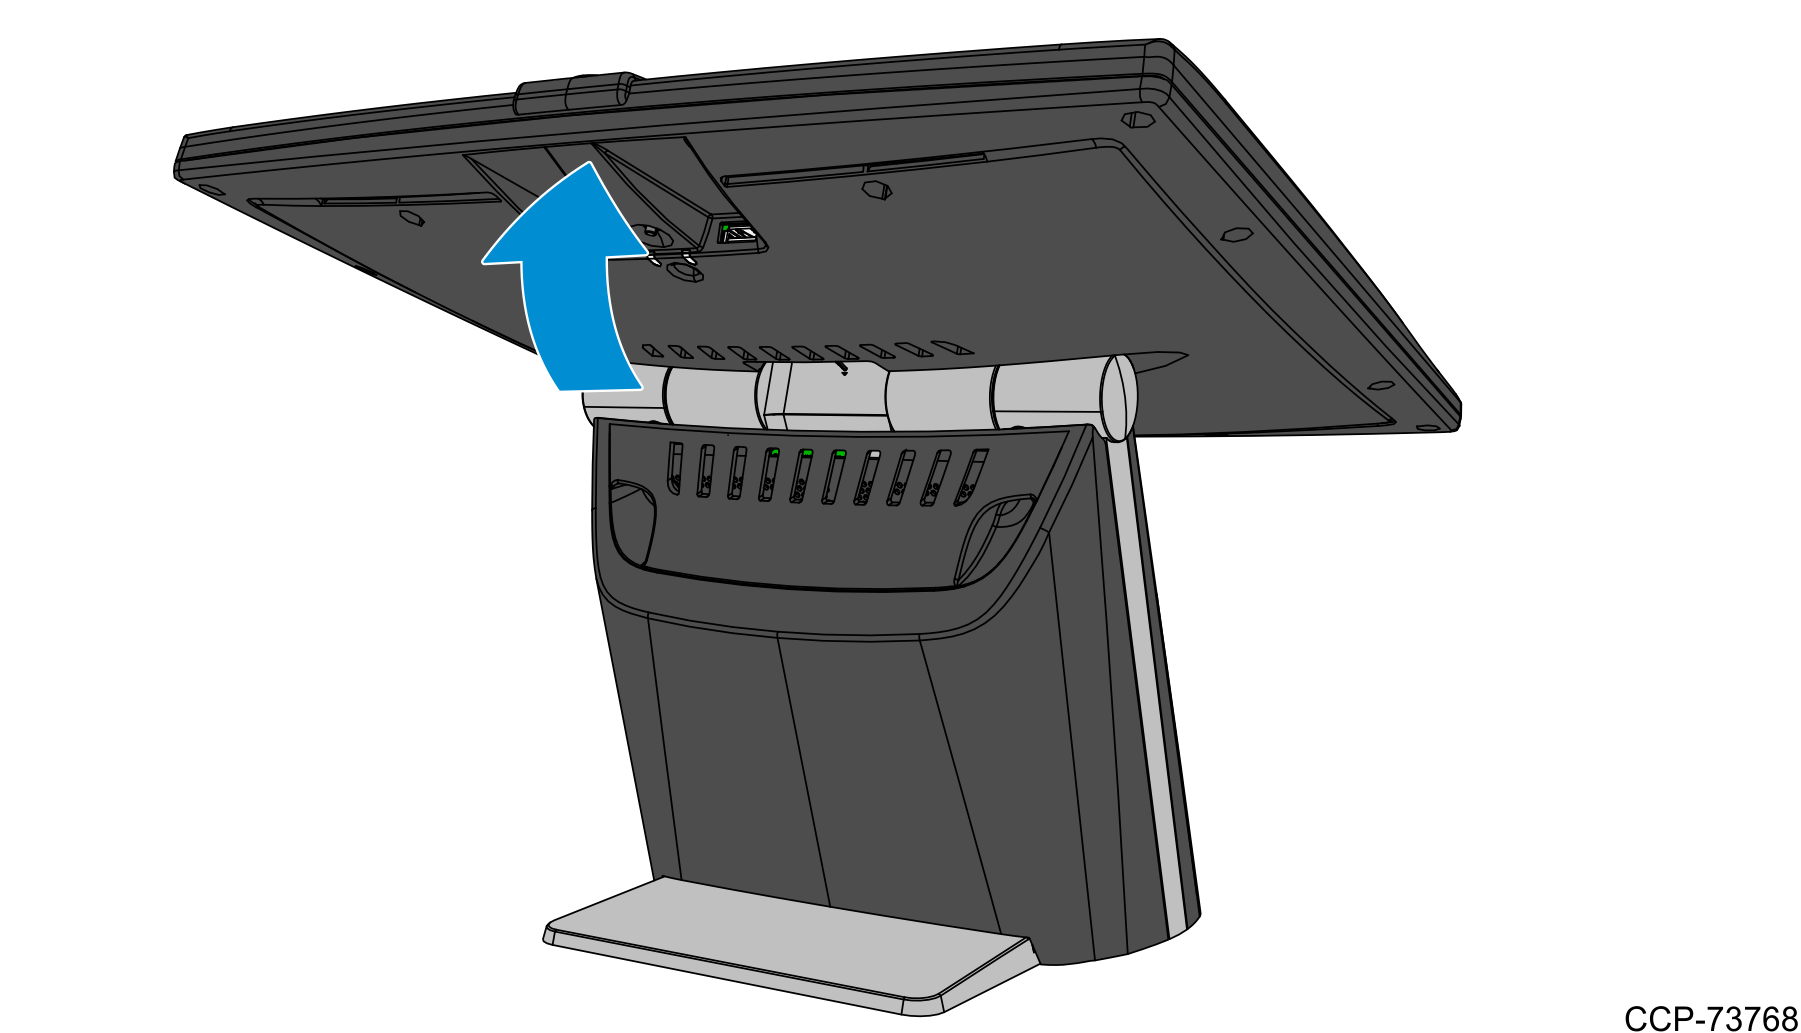
1.Tilt the Display backward.
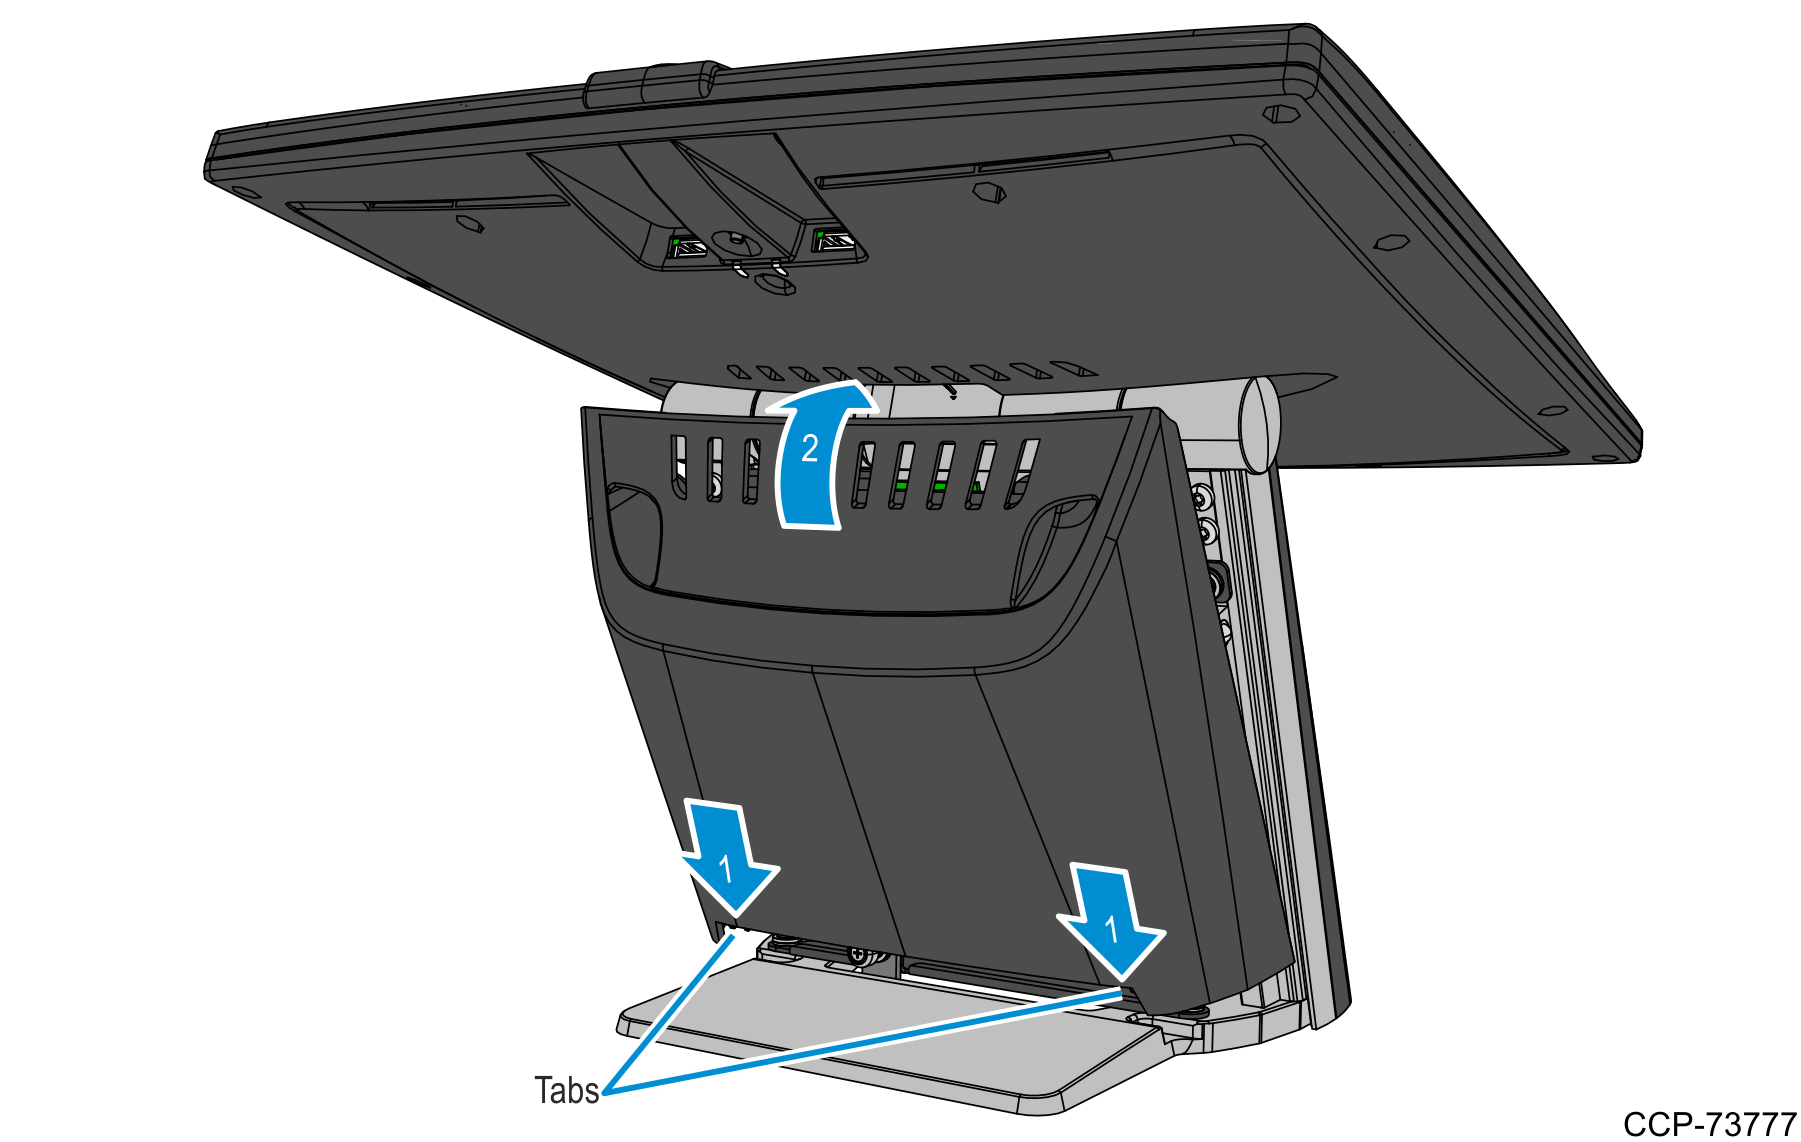
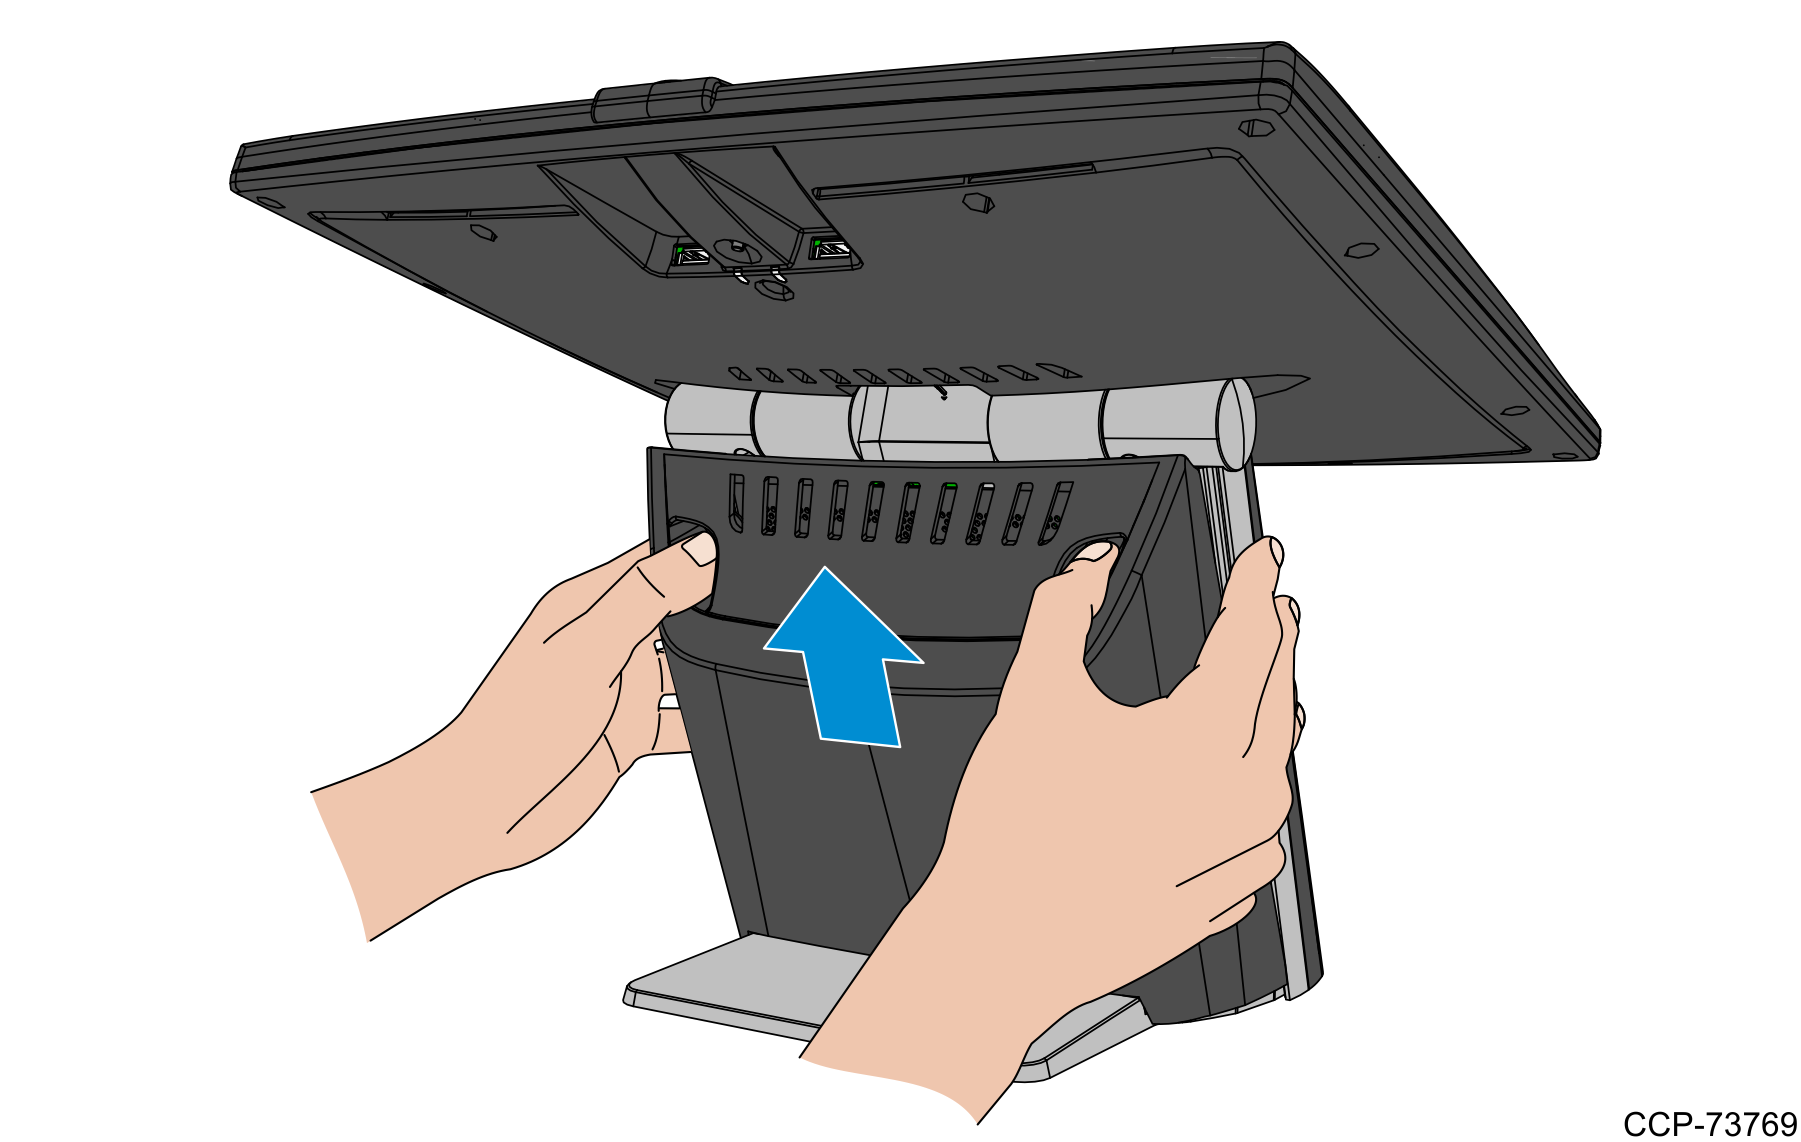
2.Slide the Front Cover upward to remove it from the stand.
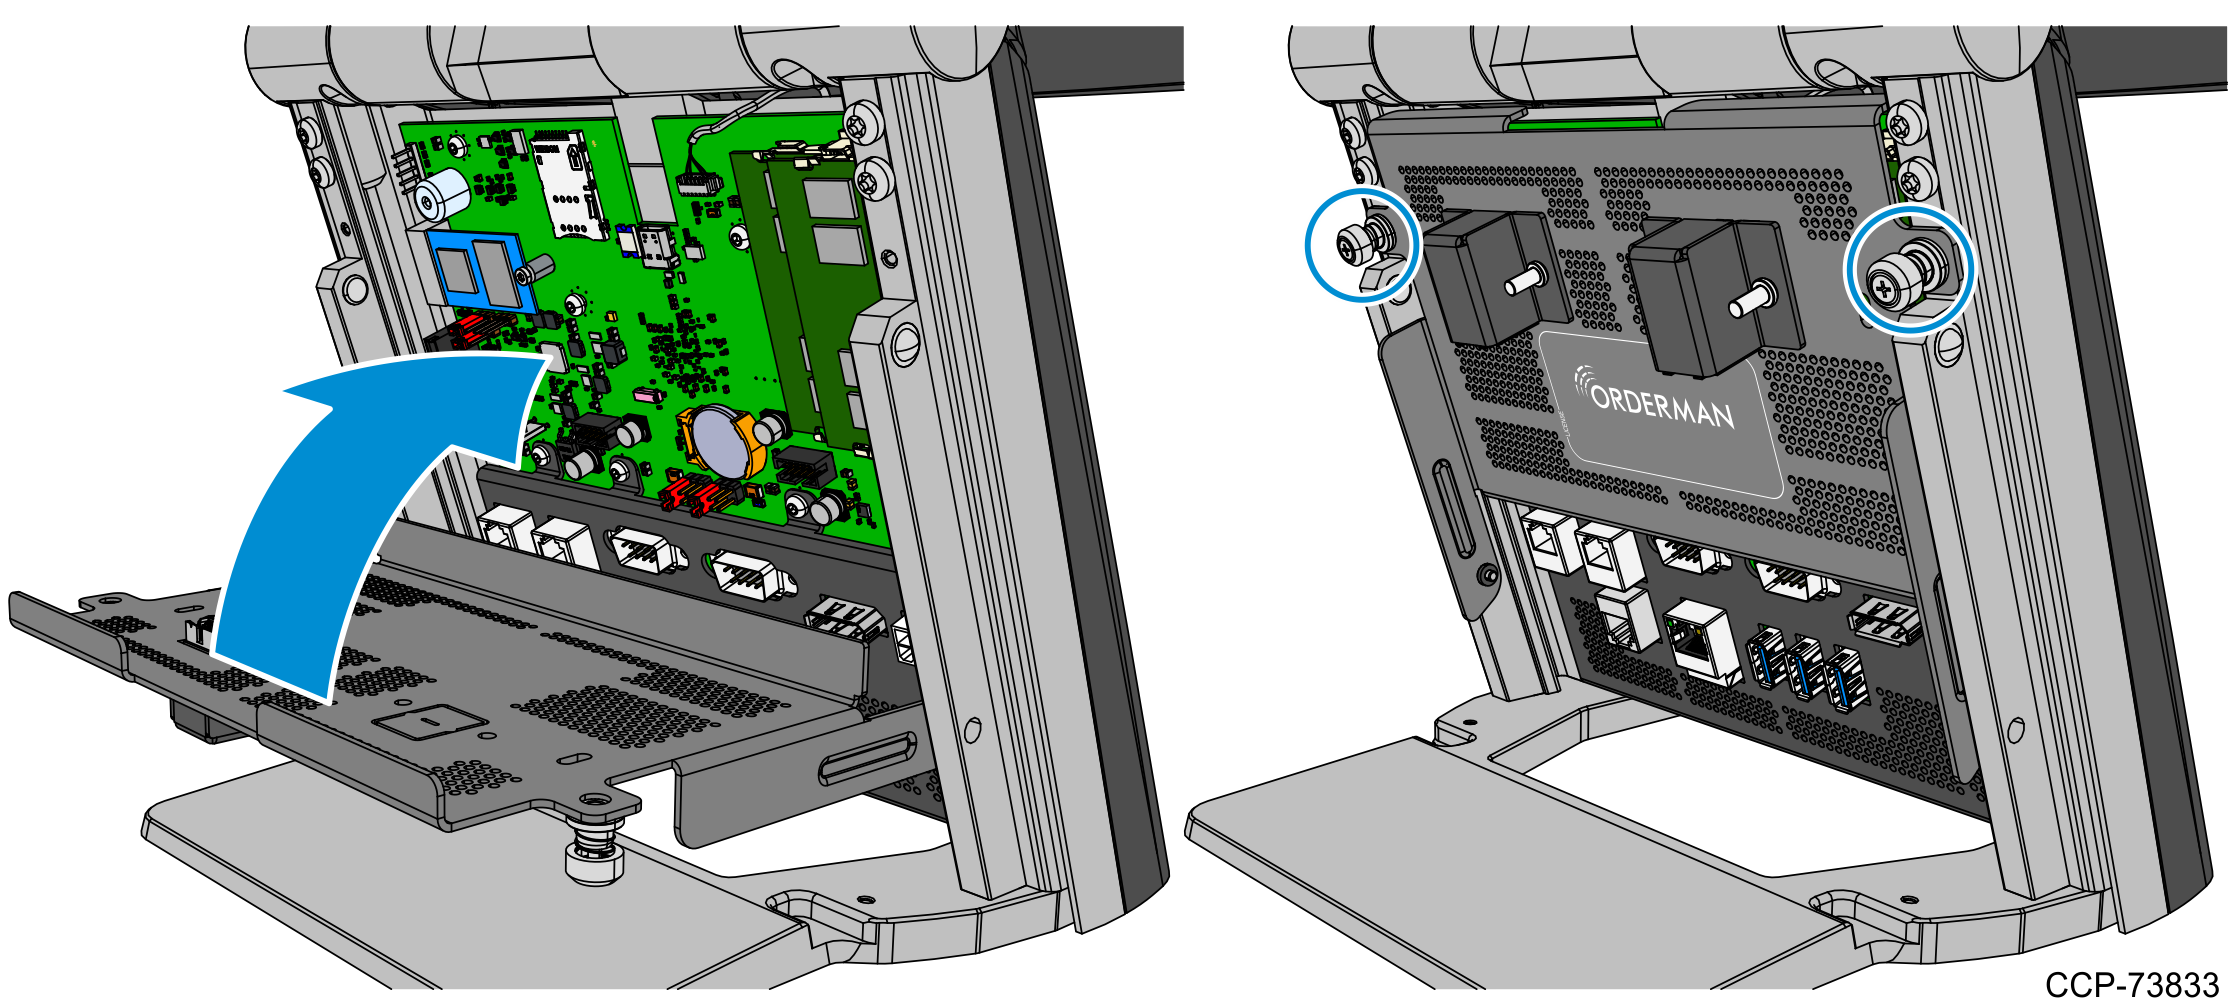
3.Loosen two thumbscrews and open the I/O Door.
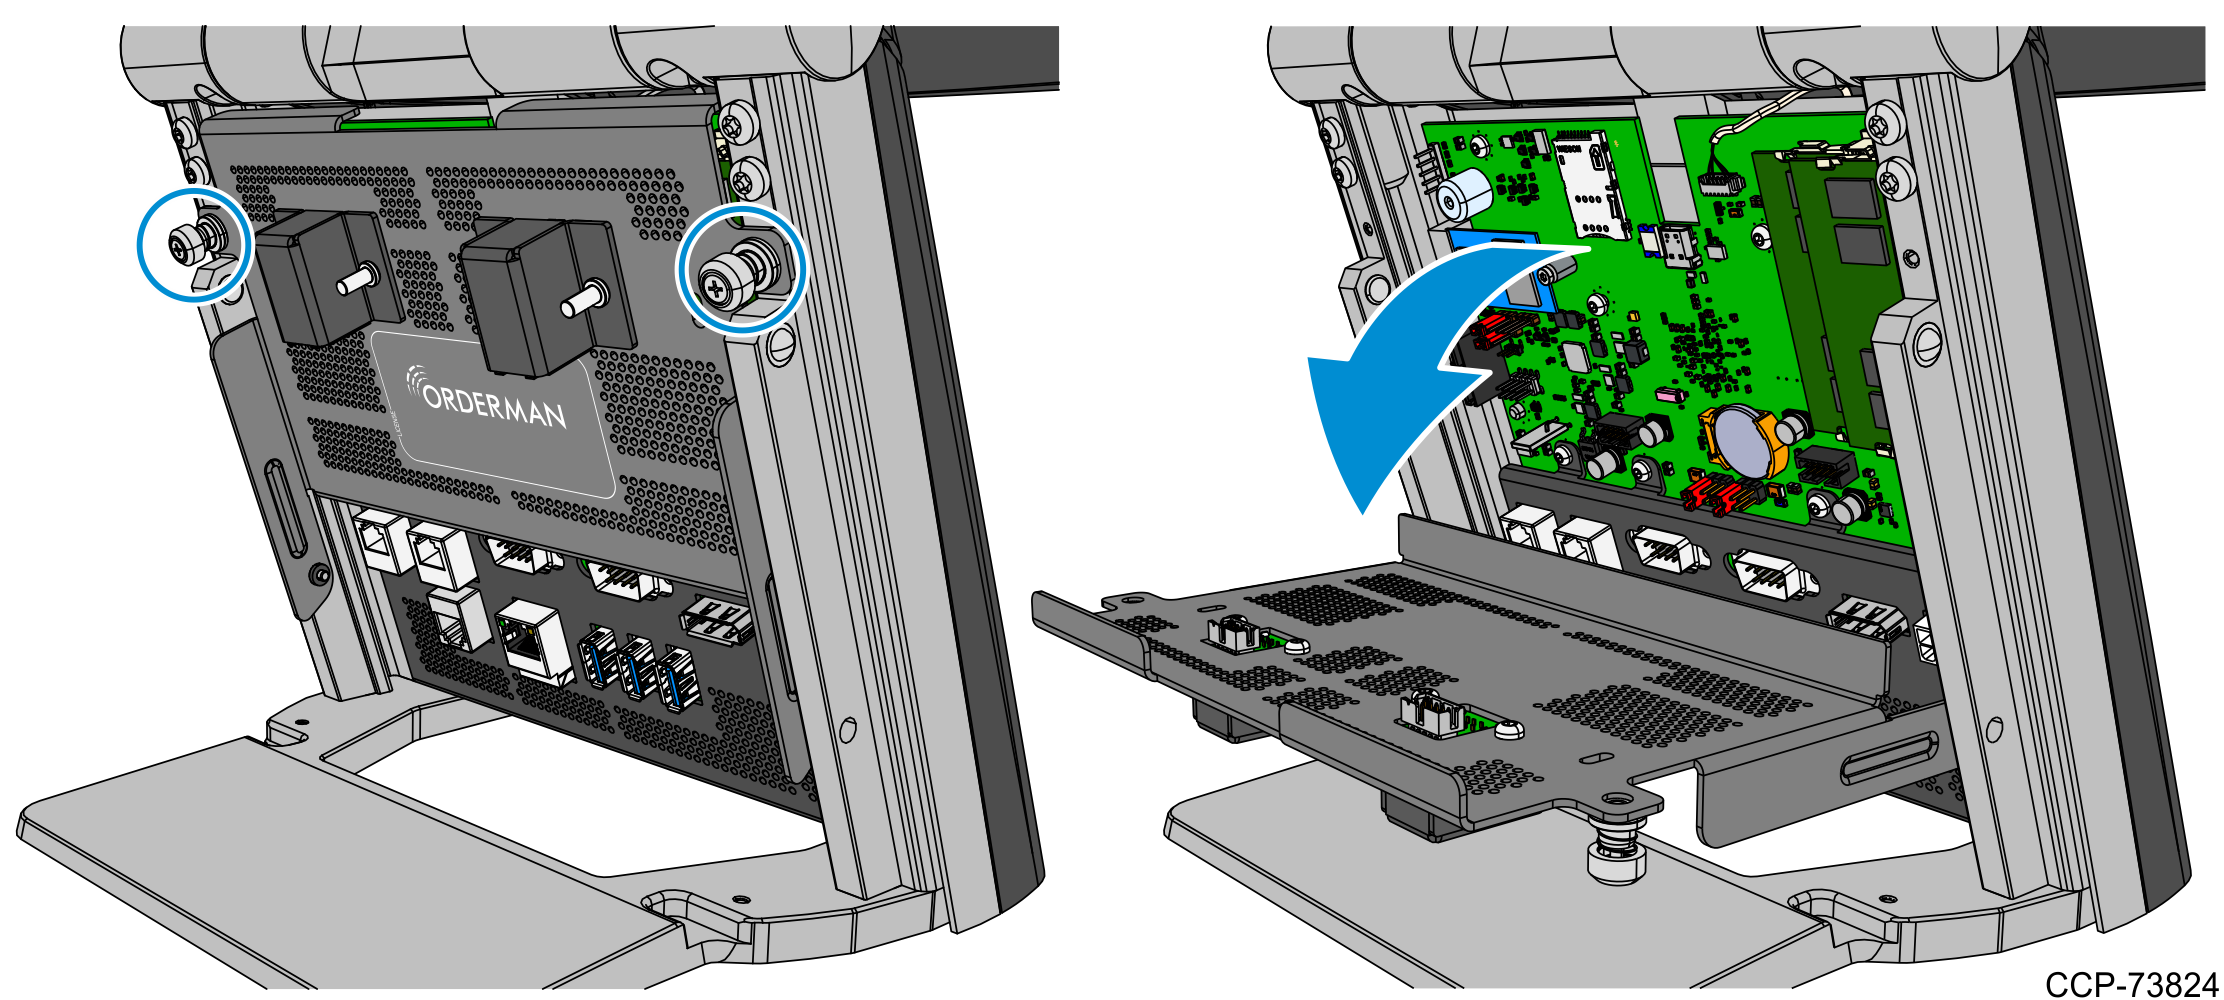
4.Remove the two M3 torx screws securing the rear cover to the stand.
5.From the rear side of the terminal, remove the Rear Cover from the stand. Rotate the top side of the cover backward and then lift the cover from the base.
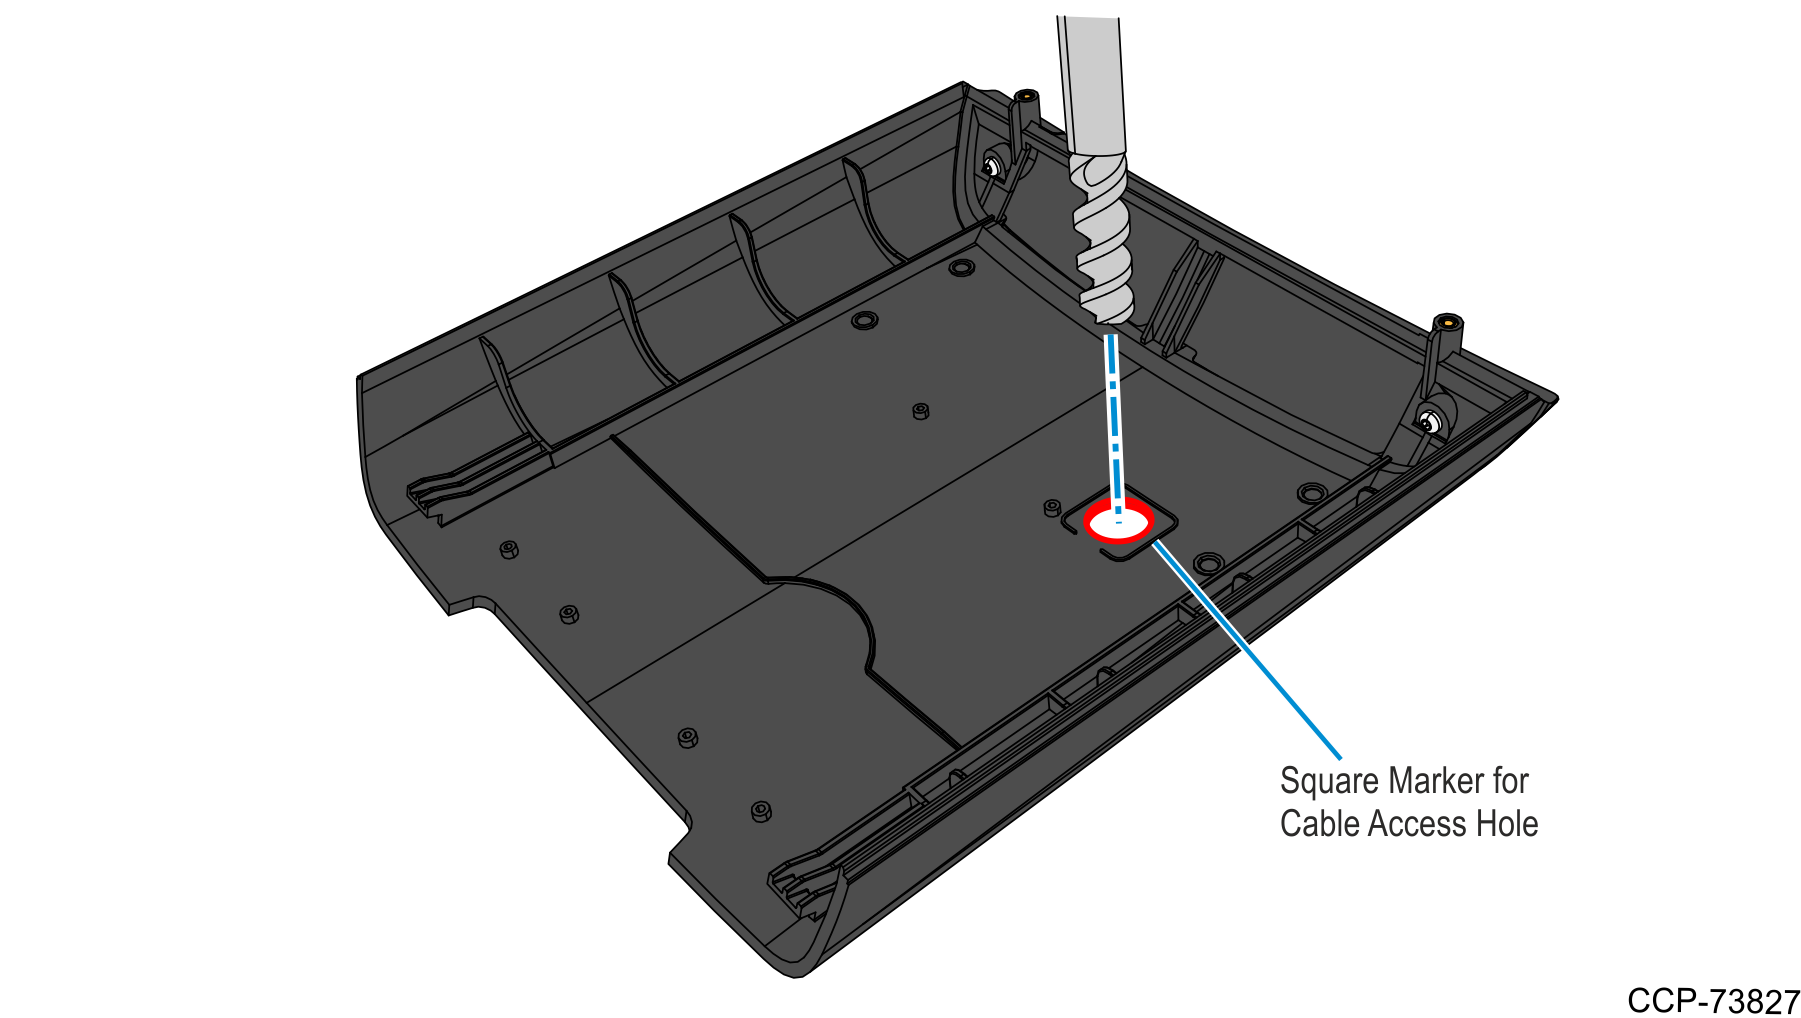
6.On the square marker at the front side of the Rear Cover, drill a 12 mm (0.47 in.) hole for display cable access.
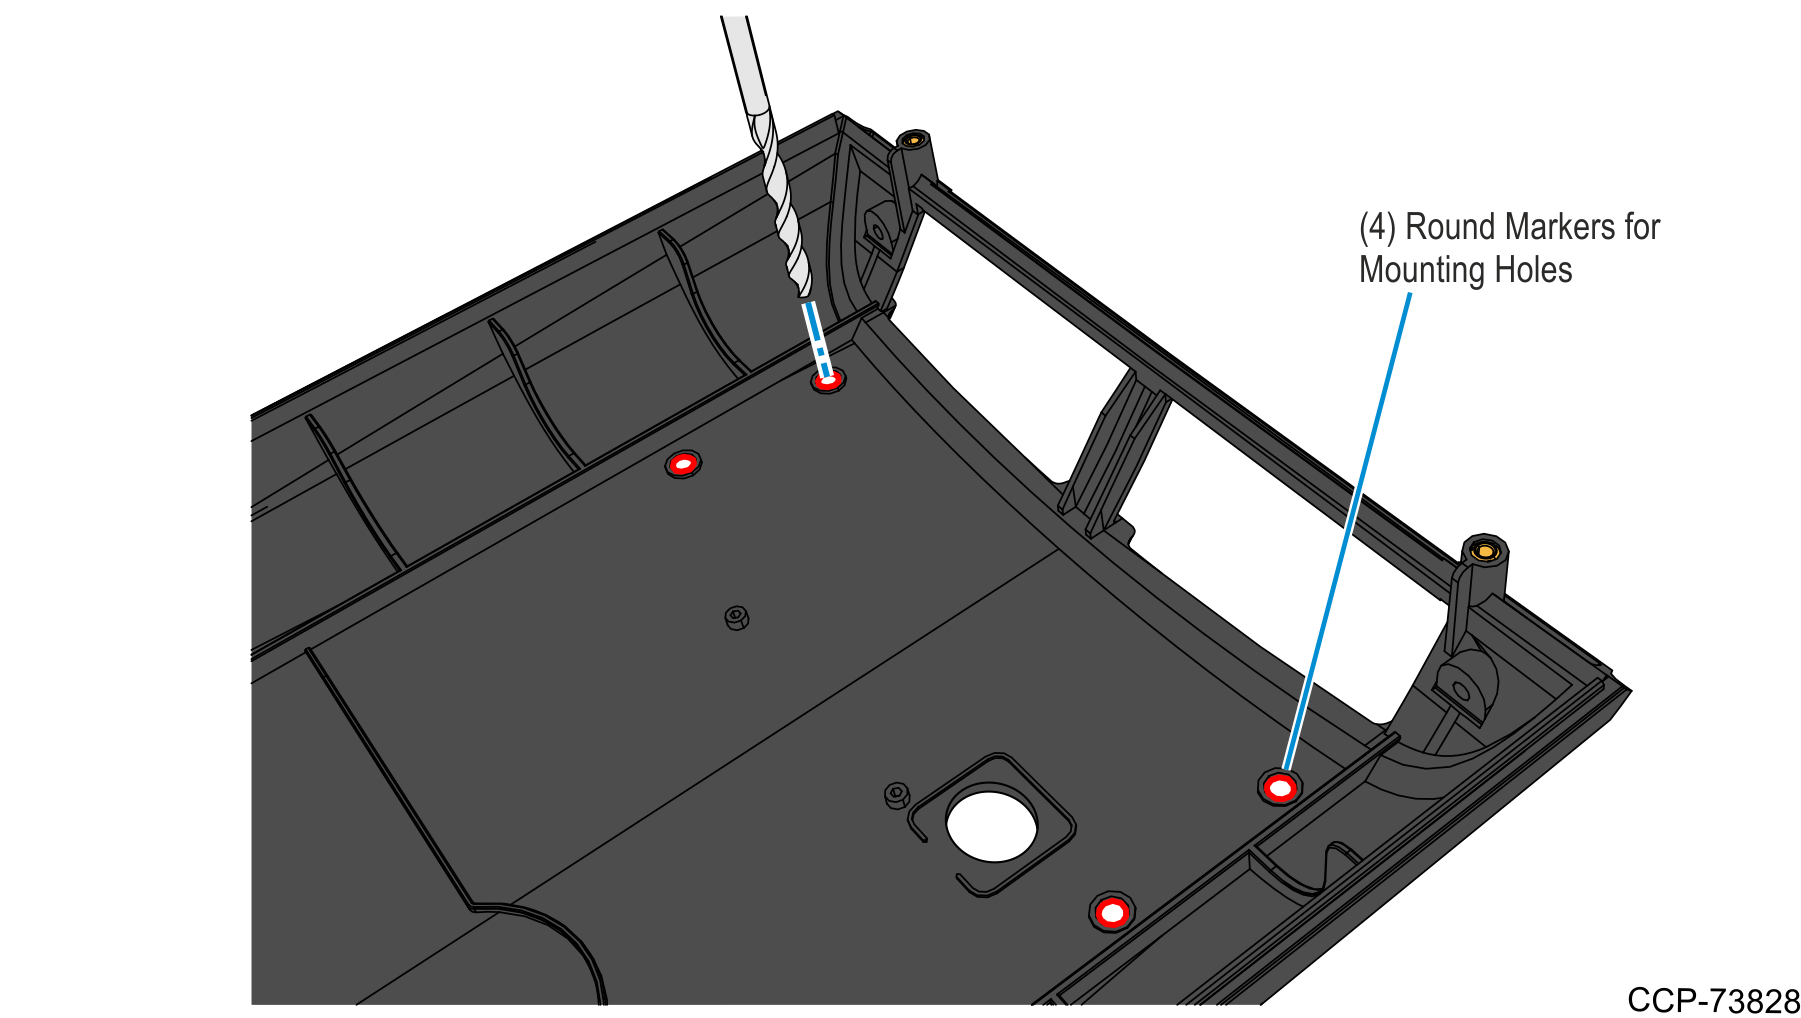
7.Drill four 3 mm (0.12 in.) mounting holes for the Customer Display on four round markers.
8.Remove the four M3x16 torx screws from the Customer Display Assembly.
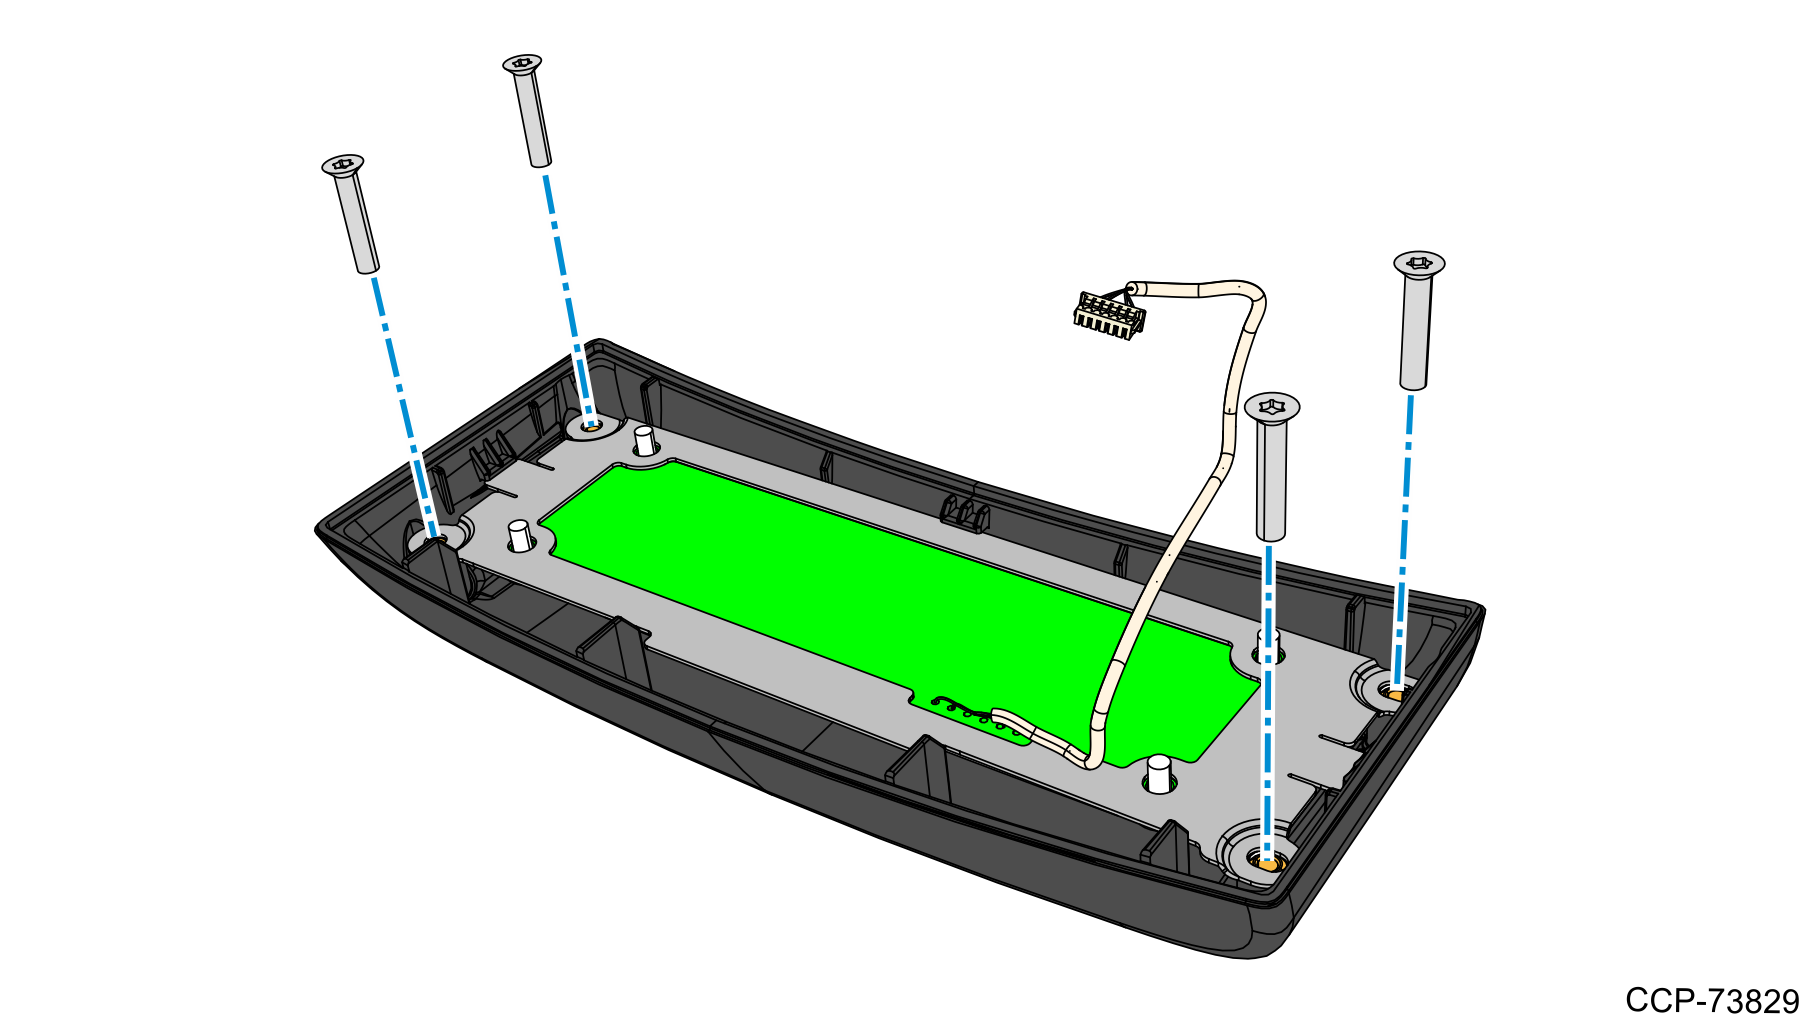
9.Mount and secure the Customer Display to the Rear Cover as follows:
a.Insert the display cable into the cable access hole.
b.Secure the Customer Display to the Rear Cover using four M3x16 torx screws.
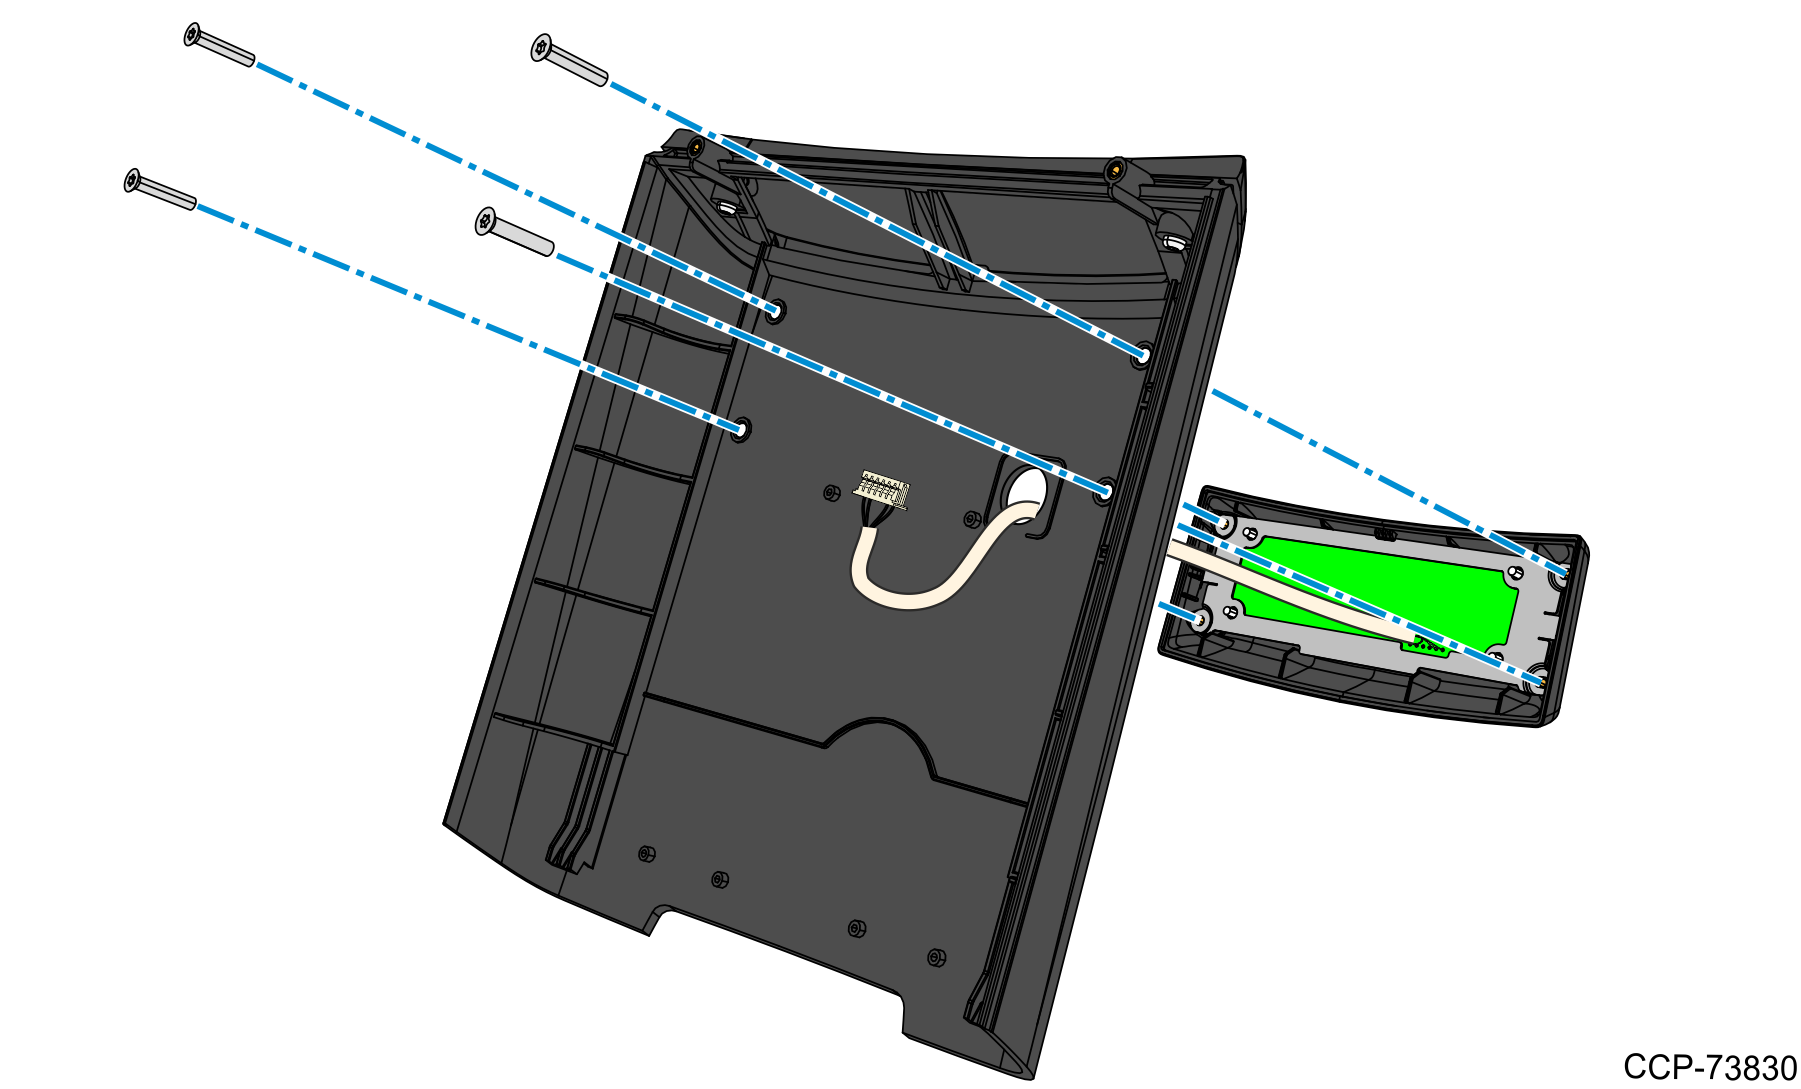
10.Mount the Rear Cover and Display assembly to the Stand as follows:
a.Insert the display cable into the gap between the Stand and Hinge.
b.Insert the hooks at the bottom side of the Rear Cover into the slots on the base.
c.Rotate the top side of the Rear Cover towards the Stand.
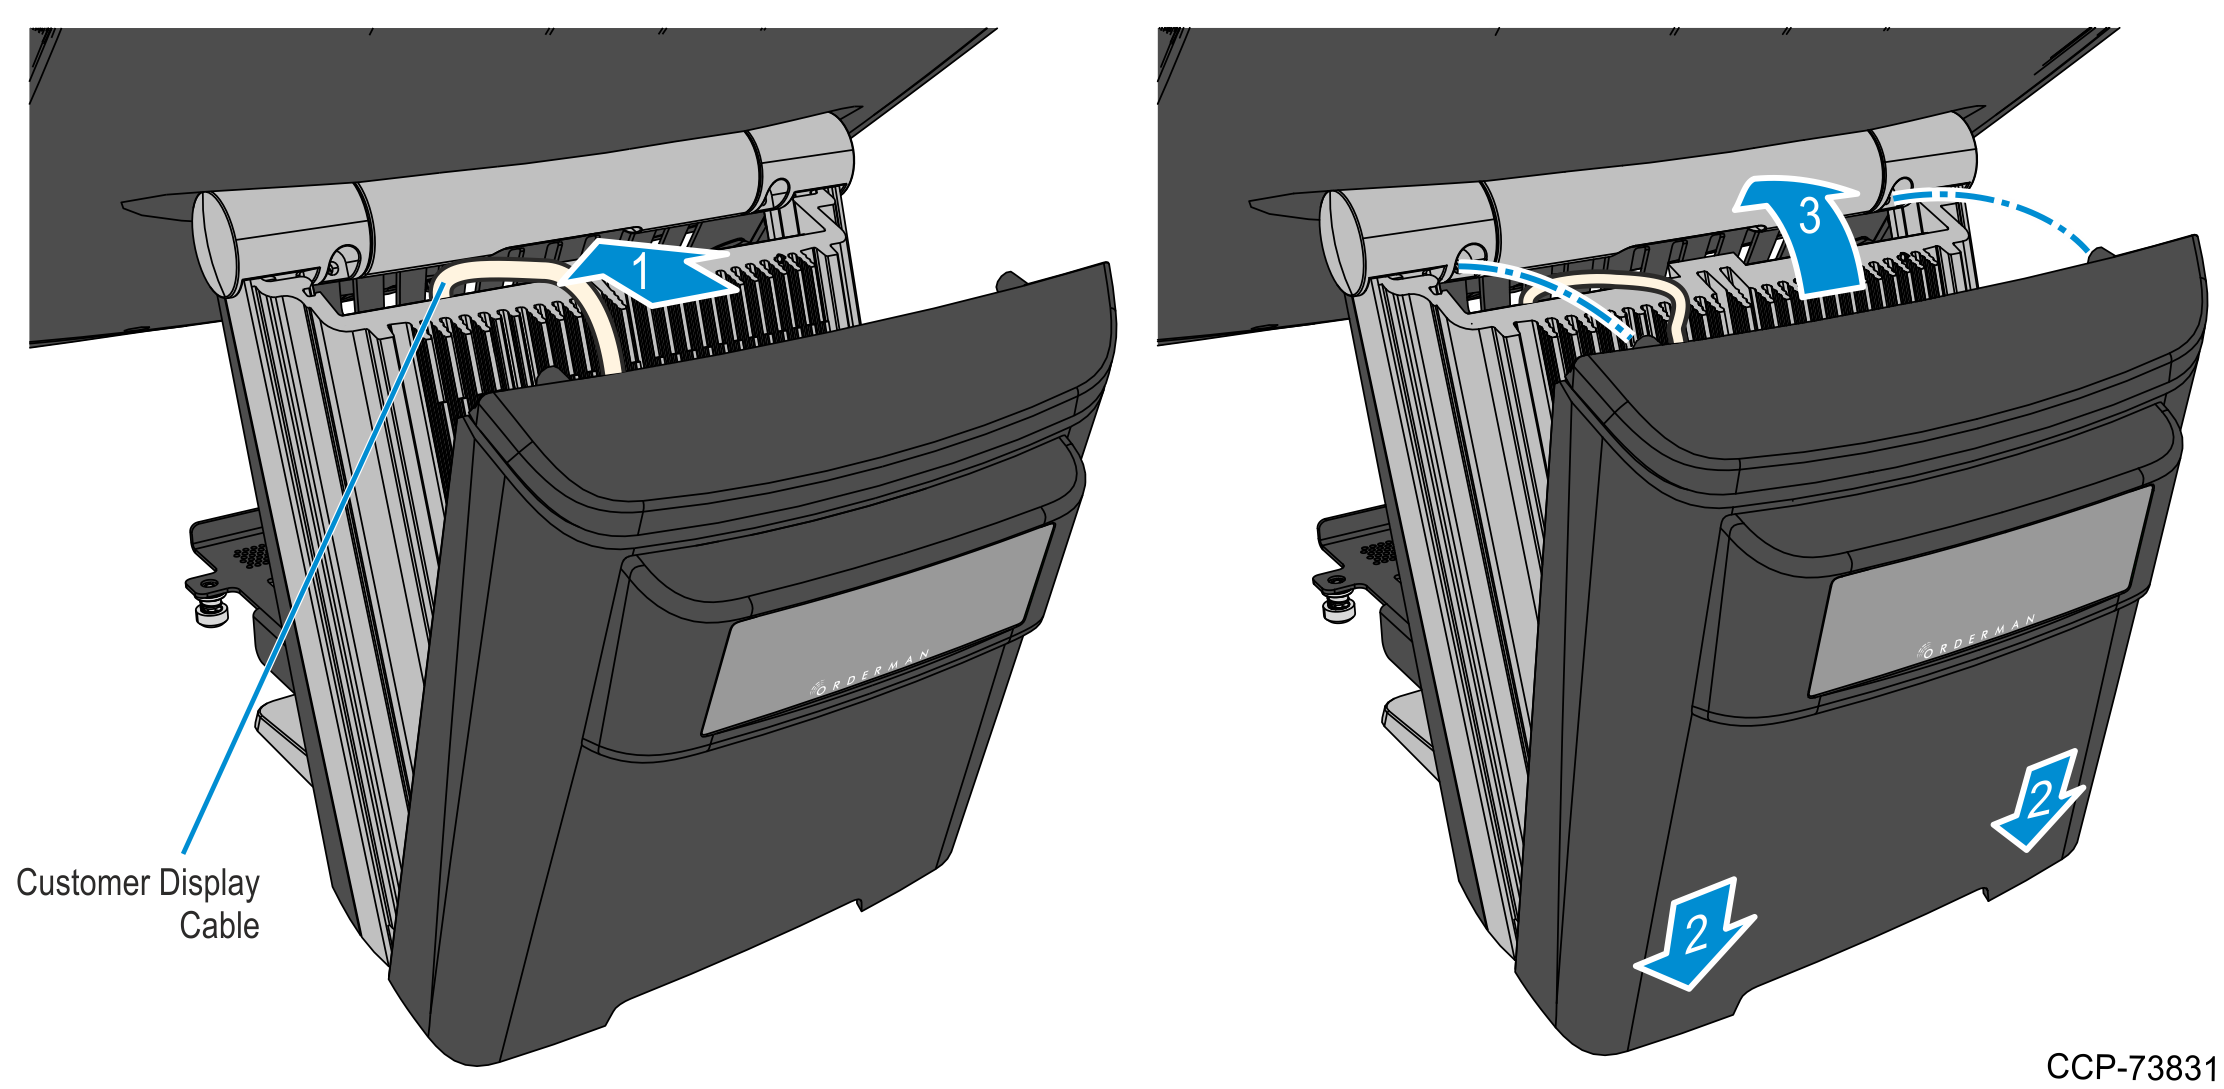
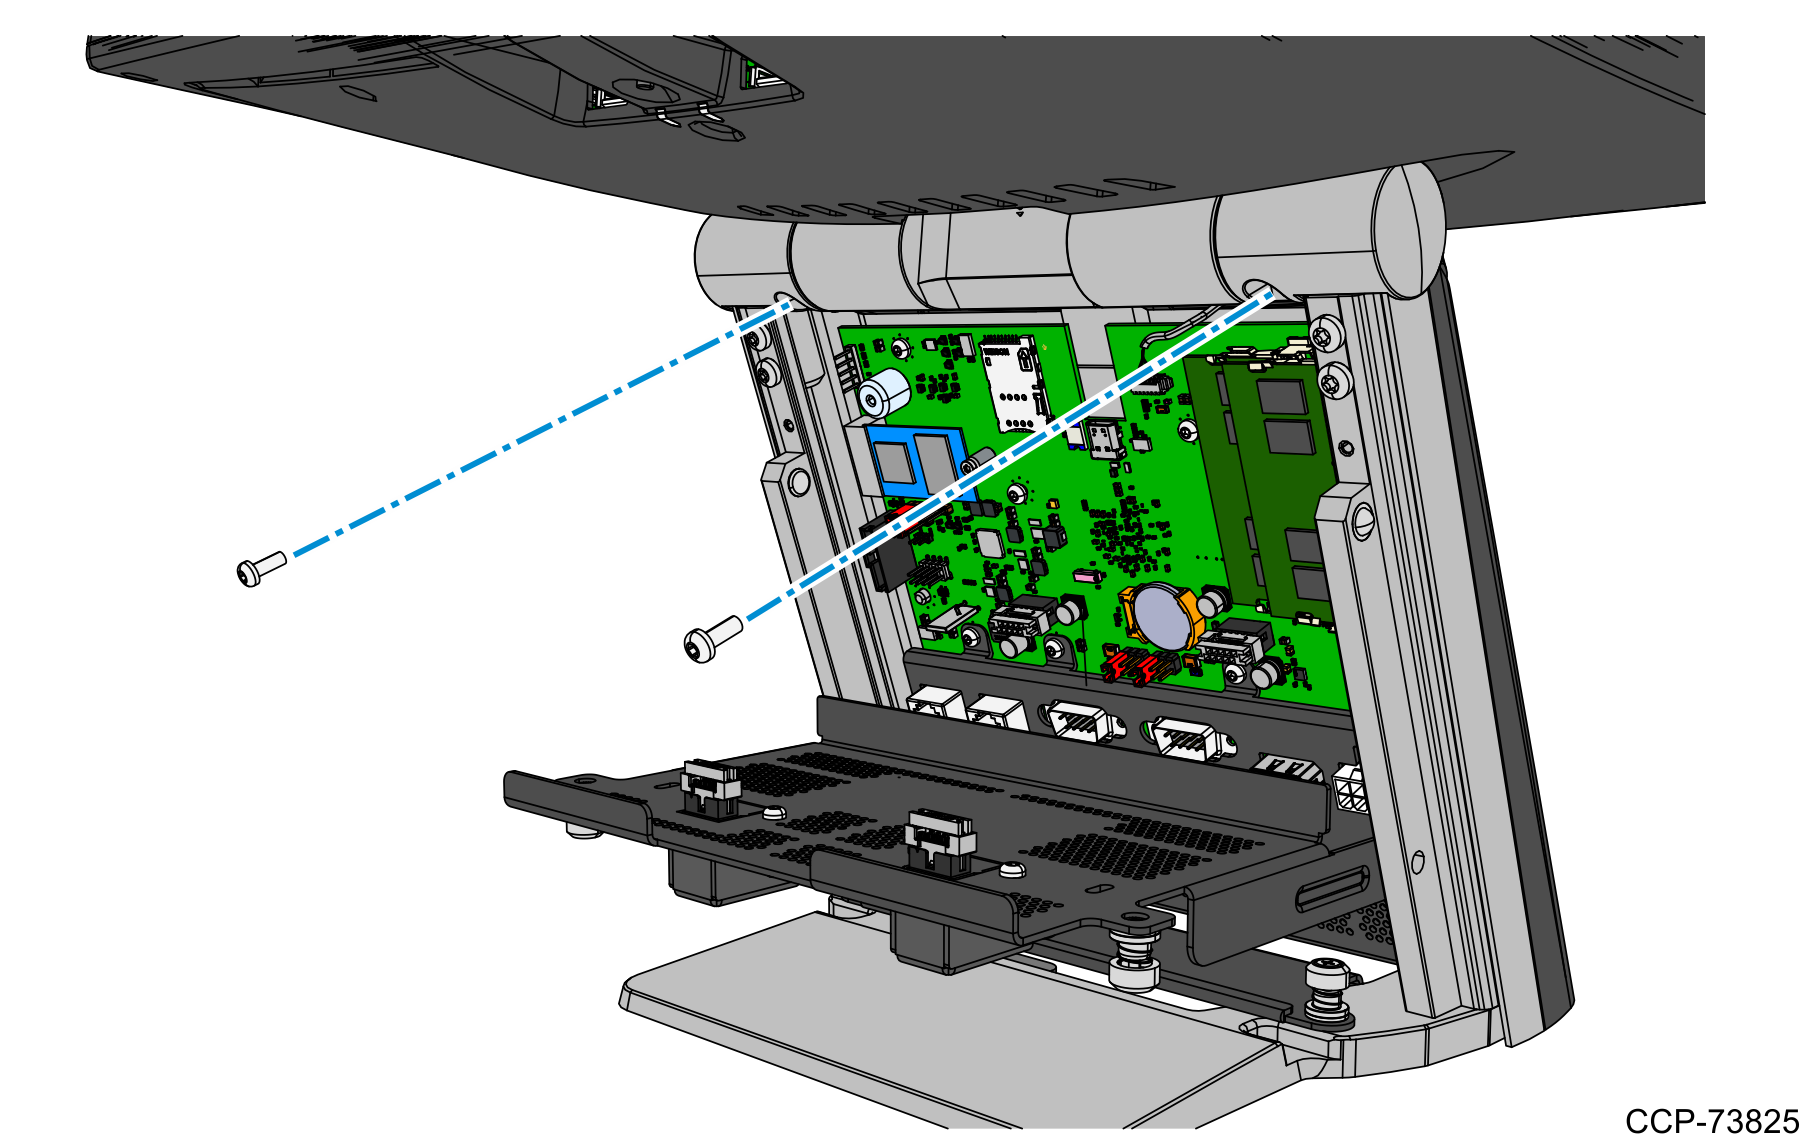
11.From the front side of the terminal, secure the Rear Cover to the Stand using two M3 torx screws.
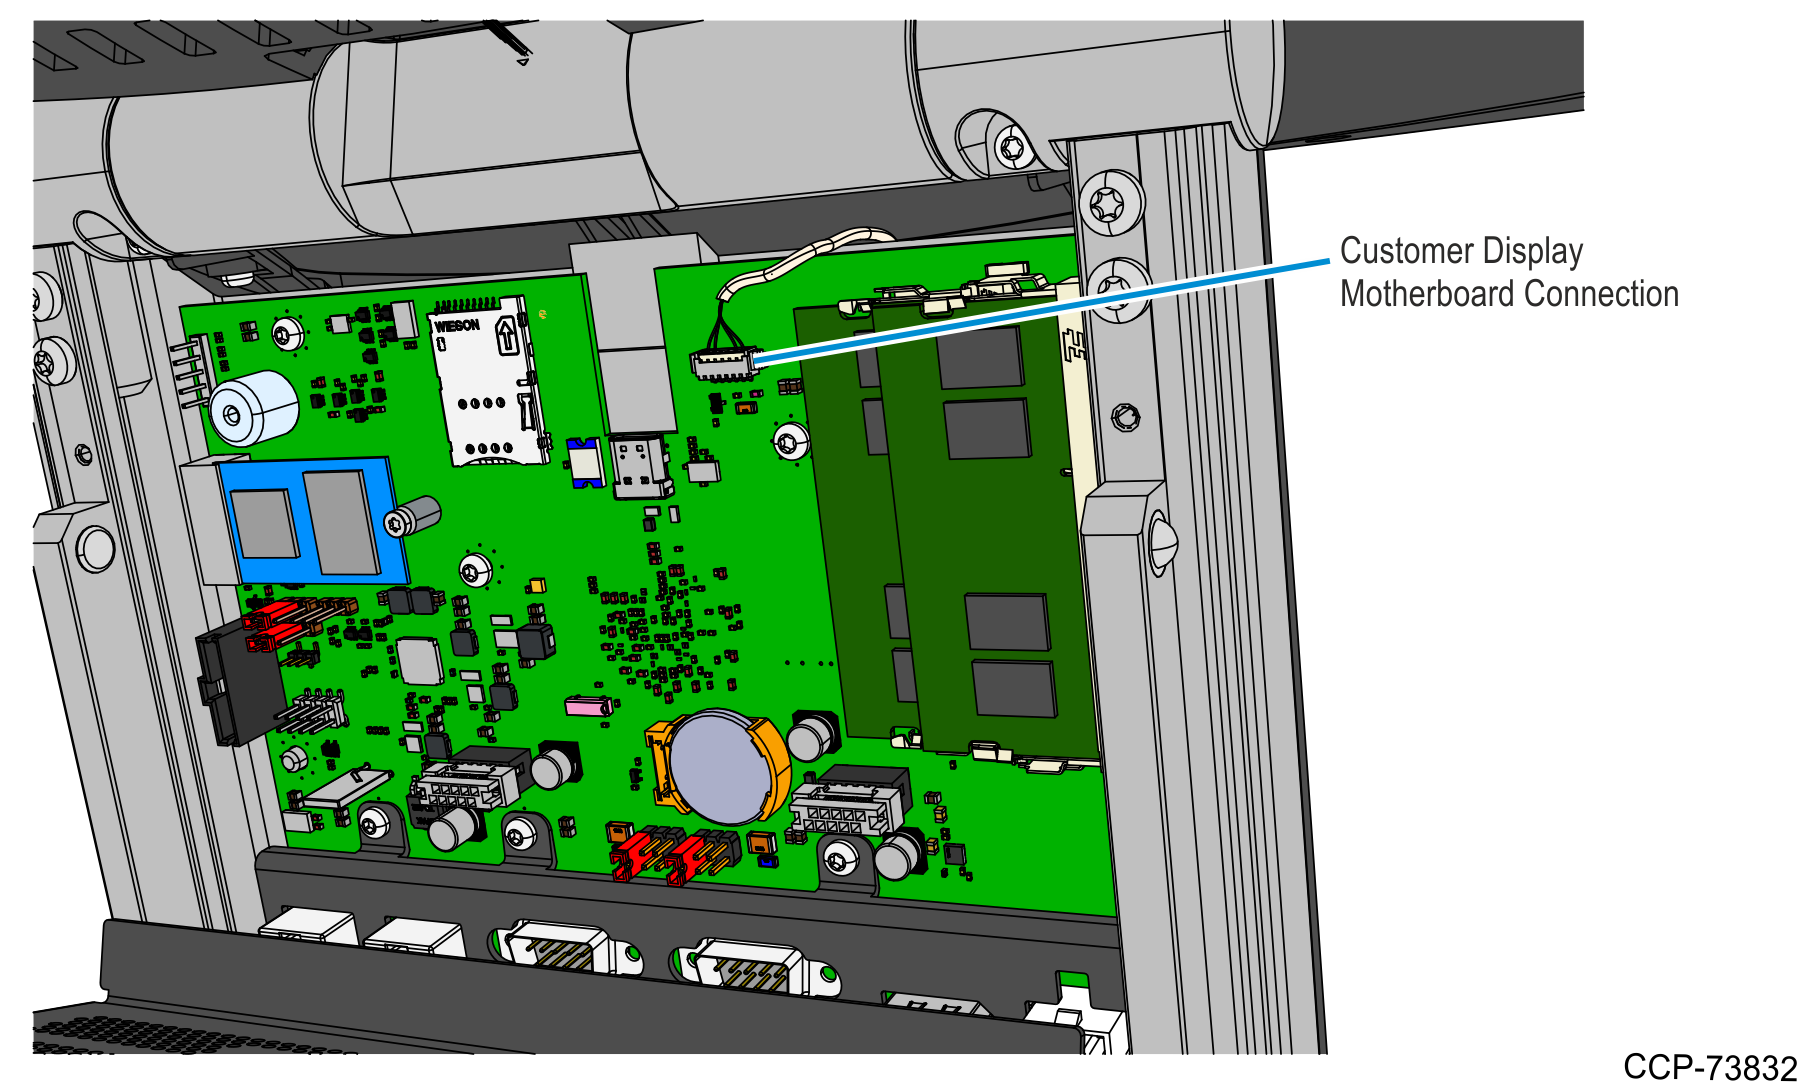
12.Connect the Customer Display cable to the Motherboard.
13.Close the I/O Door and secure it using the two thumbscrews.
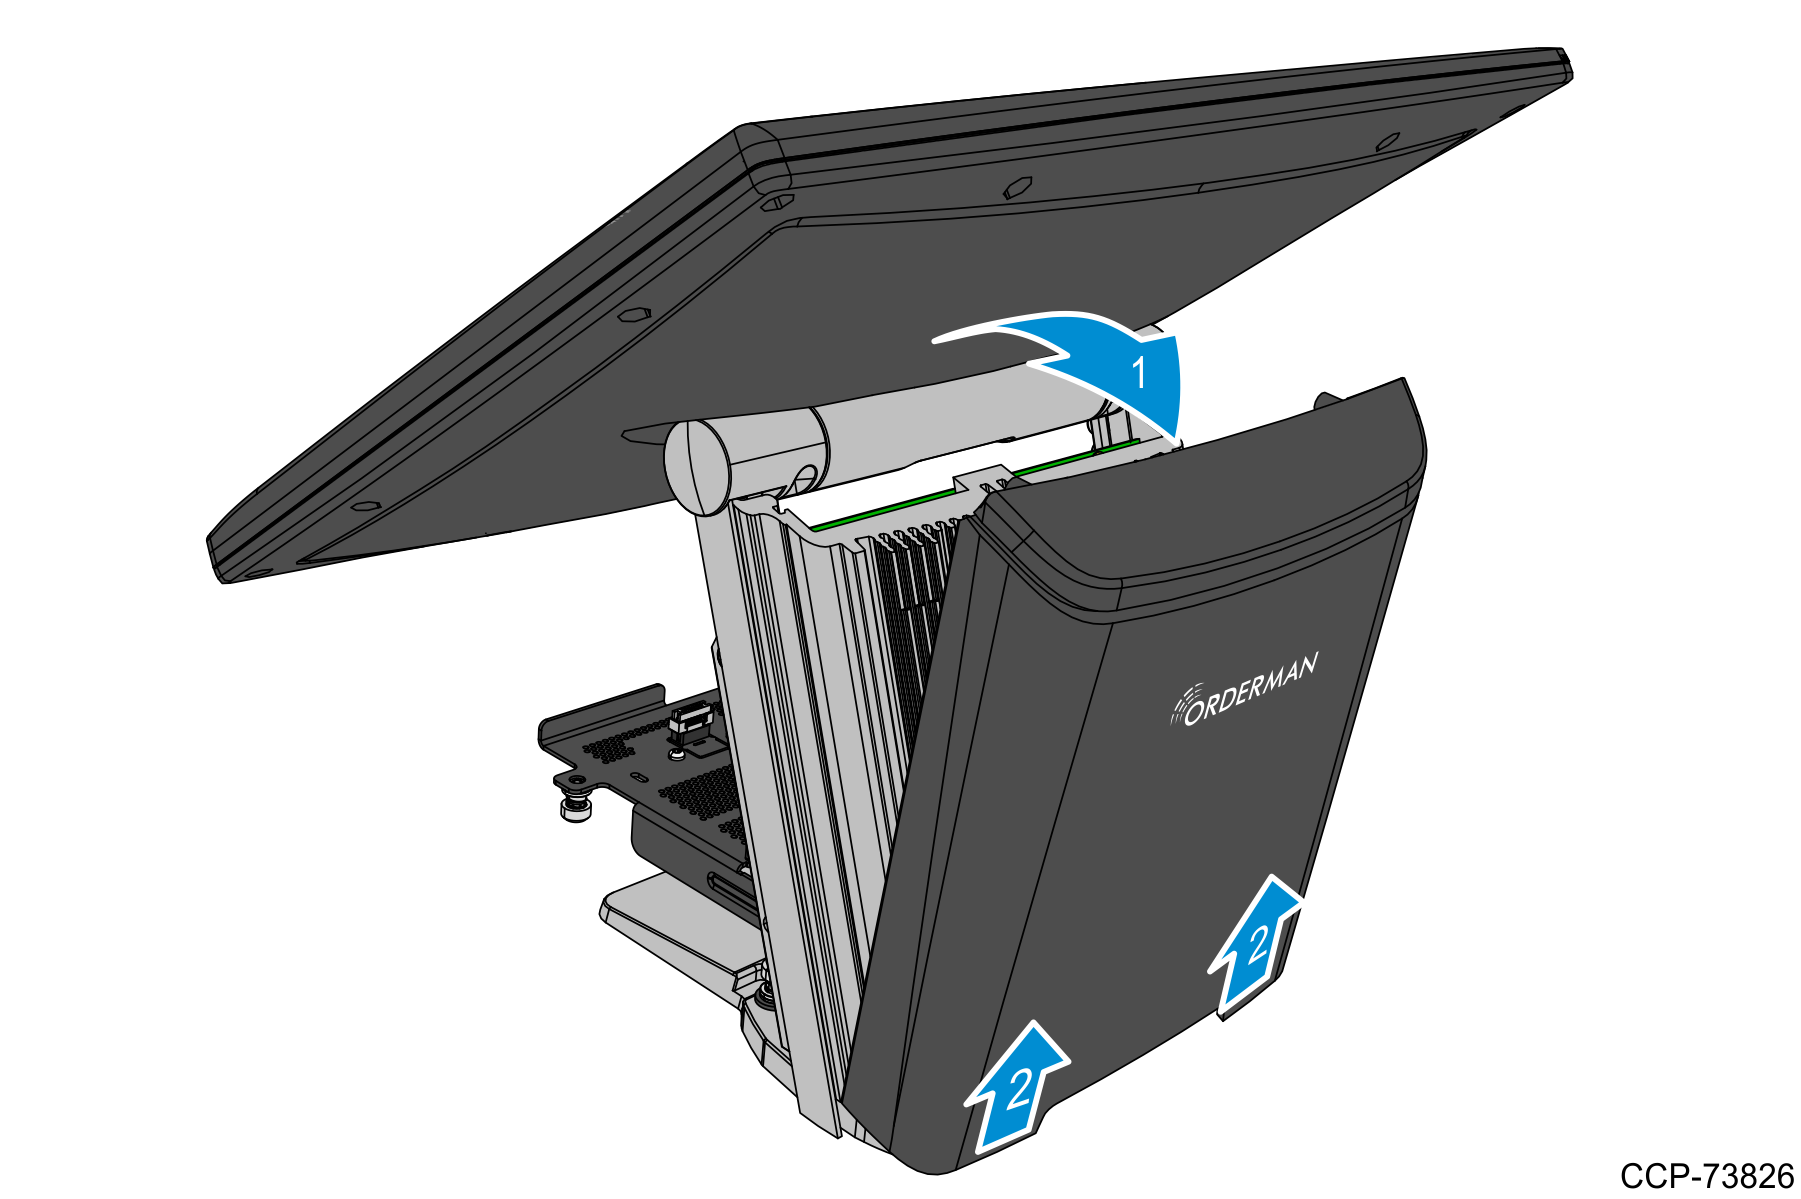
14.Install the Front Cover to the stand.
Insert the two tabs of the cover to the slots on the base of the stand and then rotate the upper part of the cover until it snaps, secured to the stand.